

How to Create Sequential Barcode Labels
Creating sequential barcode labels on macOS - whether for inventory management, asset tracking, serial numbers, or retail packaging - is straightforward using iBarcoder. iBarcoder offers built-in counter tools and batch generation features that allow you to quickly build, format, and print sequential barcodes.
Here is a step-by-step guide to setting up and printing sequential barcode labels on your Mac using iBarcoder.
Prerequisites
Before starting, ensure you have:- • iBarcoder installed on your Mac.
- • A connected label printer (e.g., DYMO, Zebra, Brother) or standard desktop printer with sheet labels (e.g., Avery).
- • Your starting serial number, prefix/suffix requirements, and target quantity.
Step 1: Create a New Label Layout
- 1. Open iBarcoder on your Mac.
- 2. Select File > New to create a new document.
- 3. Choose your paper or label layout:
-
◦ Label Templates: Select from pre-configured label templates (such as Avery, etc., sheet layouts) if
printing on standard letter/A4 paper.
◦ Custom Size: Enter the width and height for continuous thermal label rolls (e.g., 2.25"×1.25").
Step 2: Add and Configure the Barcode Object
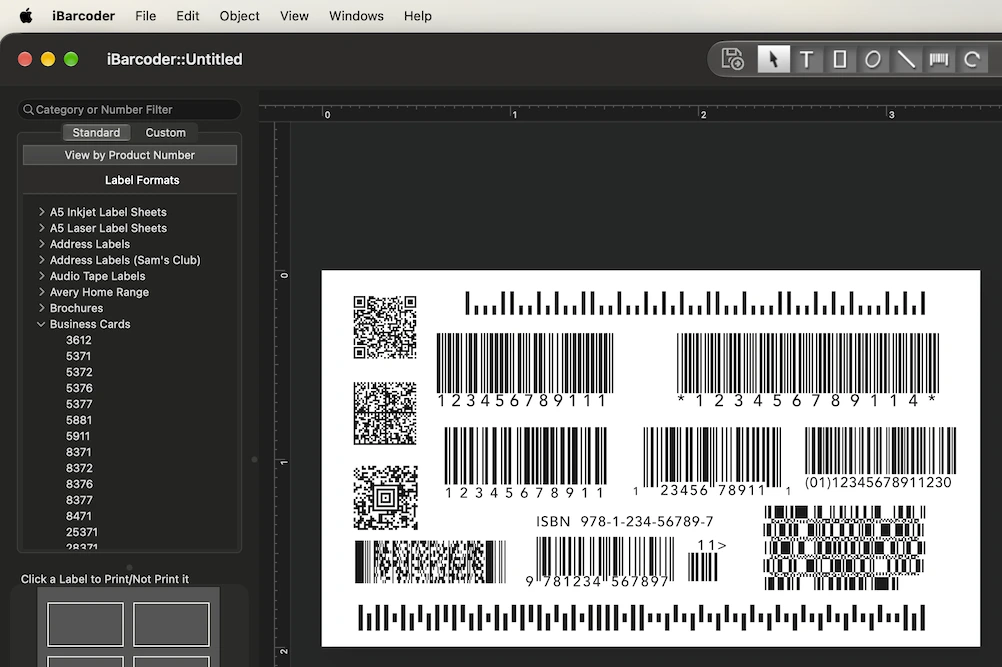
- 1. Click the Barcode icon on the toolbar and click anywhere on your label to place it.
- 2. In the right-hand panel, select your required Barcode Symbology:
-
◦ Code 128: Recommended for general serial numbers and alphanumeric data.
◦ UPC-A / EAN-13: Standard for retail product packaging.
◦ Code 39: Commonly used in logistics and warehousing.
◦ QR Code: Useful for embedding web links or detailed contact info. - 3. Position and resize the barcode on your label area using the layout guides.
Step 3: Set Up the Sequential Counter
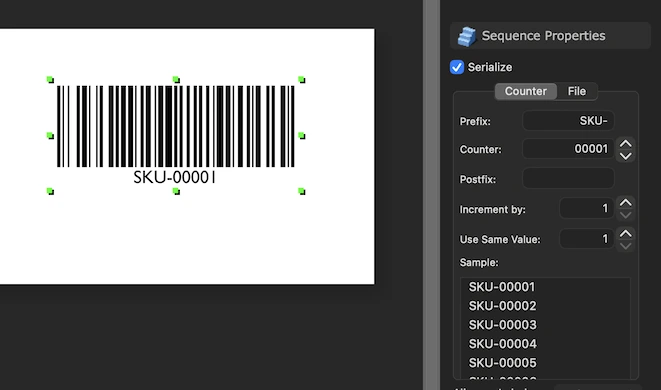
iBarcoder uses a built-in sequence/counter function to increment barcode numbers automatically.- 1. Select the barcode object on your label.
- 2. Go to the Data tab in the inspector panel on the right.
- 3. Set the data source mode to Sequence / Counter (or Dynamic Data).
- 4. Configure the sequence parameters:
-
◦ Prefix: Fixed characters before the number (e.g., INV- or SN-).
◦ Start Value: The initial starting number for your sequence (e.g., 1001).
◦ Increment: The step count for each label (typically 1).
◦ Padding / Number Length: Set leading zeros to maintain uniform barcode width (e.g., setting length to 5formats 1 as 00001).
◦ Suffix: Any fixed characters following the number (e.g., -2026).
- • Prefix: SKU-
- • Start Value: 00001
- • Increment: 1
- • Generated Sequence: SKU-00001, SKU-00002, SKU-00003, ...
Step 4: Add Supporting Text and Graphic Elements
Enhance your label layout by adding human-readable text or extra design elements:- 1. Human-Readable Text: Check the Show Text box in the barcode properties to render the underlying numbers beneath the bar lines.
- 2. Custom Labels: Choose the Text Tool from the Tools Area, then click on your label to add fixed text headers (e.g., Company Name, Product Title, or "Property Of").
- 3. Images/Logos: Drag and drop vector graphics or bitmap images onto the label area to complete your label design.
Best Practices for Barcode Scanning Accuracy
- 1. Respect Quiet Zones: Always leave at least 0.25 inches of clean white space on the left and right edges of the barcode so hardware scanners can locate start/stop markers.
- 2. Maintain High Contrast:Stick to dark bars (preferably black) on a crisp white background. Avoid light-colored bars or textured backgrounds.
- 3. Resolution Settings: For thermal transfer and direct thermal label printers, ensure print quality is set to maximum contrast or native printer resolution (203 DPI or 300 DPI) to prevent ink bleed and soft bar edges.