

How to export vector barcodes for commercial printing
Commercial printing requires vector graphic output so barcodes scale to any size, maintain crisp edges at high DPI, and conform to strict printer color specifications (like 100% K Process Black). Exporting raster formats like PNG or JPEG risks anti-aliased edges, fuzzy bars, and misreads at the checkout scanner.
Here is a step-by-step technical guide to exporting print-ready vector barcodes using iBarcoder for Mac.
Choose the Right Vector Export Format
iBarcoder supports several file types, but three primary formats are designed for pre-press workflows:- • EPS (Encapsulated PostScript): The industry standard for legacy prepress workflows and dedicated graphics software like Adobe Illustrator or QuarkXPress.
- • PDF (Portable Document Format): The modern standard for vector publishing. Preserves resolution-independent paths and exact font embed specifications.
Set Up Color and Dimensions in iBarcoder
Before exporting, configure your barcode specifications to meet print standards:- • Set Barcode Type & Data: Select your symbology (UPC-A, EAN-13, Code 128, QR Code, GS1-128, etc.) and enter the required sequence or payload.
- • Configure Color (100% Process Black): The international standard, widely used across Europe, Asia, and the rest of the world, so for for commercial printing, switch the iBarcoder to CMYK mode.
- • Bar Width and Height: Required for products listed on Amazon's international marketplaces (e.g., Amazon UK, Germany, France, Japan).
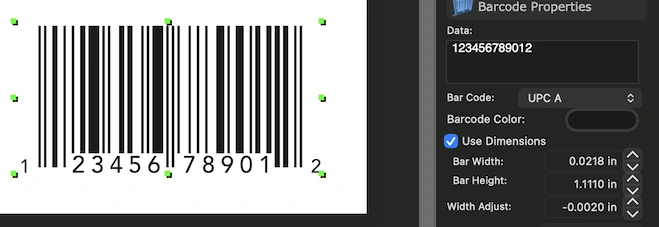
Adjust the Bar Width Reduction
During commercial printing—especially flexography or screen printing—ink bleeds outward as it hits the substrate. This effect is known as press gain.If ink spreads, the black bars expand into the white spaces, altering the bar-to-space ratio and rendering the barcode unscannable.
To compensate, use iBarcoder's Adjust Width setting:
- • Ask your commercial printer for their press gain/BWR tolerance value (typically between 0.01 mm and 0.05 mm).
- • Enter this value into the Adjust Width field in the iBarcoder panel to narrow the exported bars by the exact thickness of expected ink spread.
Choose the Export format
iBarcoder allows to export images to different image formats:| Feature / Metric | Vector Export (EPS / PDF) | Raster Export (PNG / JPEG) |
| Resolution Independence | Infinite (Scalable to any size) | Fixed DPI (Pixelates if resized). |
| Edge Sharpness | Mathematical paths (Zero blur) | Subject to anti-aliasing / pixel fringing. |
| Ink Bleed Control | Precise sub-pixel bar adjustment | Rounded pixel edges distort bar ratios |
| Prepress Suitability | Standard for Commercial Print | Restricted to low-cost thermal desktop tags |
Export the Vector Barcode File
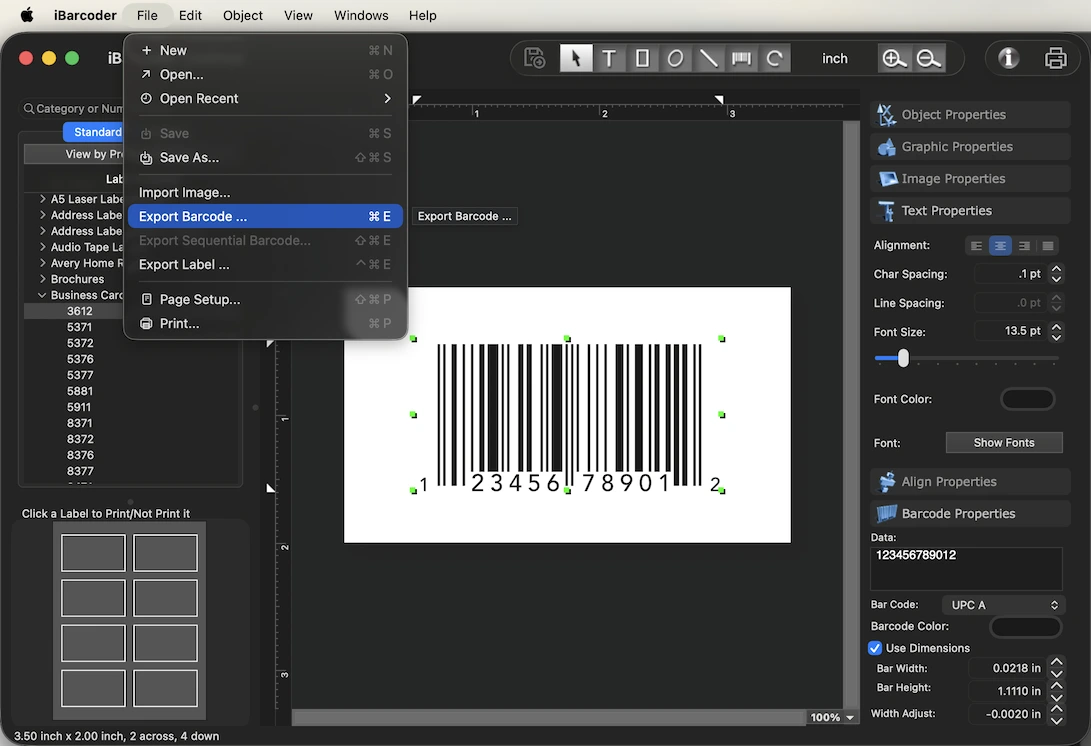
Once your barcode design is finalized:- 1. Go to the menu bar and select File > Export... (or click the Export button on the toolbar).
- 2. Set the Format dropdown to EPS, or PDF.
- 3. Choose your destination directory and click Save.
Pre-Flight Checklist for Prepress Integration
When placing the exported file into Adobe InDesign, Illustrator, or QuarkXPress:| Requirement | Inspection Standard | Action |
| Format Verified | Vector (EPS / PDF) | Confirm the barcode image file saved as .eps or .pdf. |
| Color Separation | Single-channel K | Confirm the barcode renders only on the Black plate in your layout tool's Separation Preview panel. |
| Size | Default | Use the default size for each barcode type, do not scale the vector unequally along one axis (stretching), as this distorts aspect ratios and breaks scan compliance. |
| Font Outlines | Embedded / Outlined | iBarcoder automatically converts human-readable text beneath the barcode into paths during vector export, eliminating missing font issues at printing. |